|
Compatible Pitney Bowes 793-5
(Top View with Seal on)
|
Compatible Pitney Bowes 793-5
(Top View with Seal removed)
|
|
|
|
|
Compatible Pitney Bowes 793-5
(Bottom View with Seal on)
|
Compatible Pitney Bowes 793-5
(Bottom View with Seal removed)
|
|
|
|
|
Compatible Pitney Bowes 793-5
(Side View)
|
|
|
1. Open the top cover. The Top Cover Open message will appear.
2. Select Replace ink tank to continue. The message Moving Ink Tank to Replacement Position will appear.
3. Flip the ink cartridge guard open.
4. Lift up and remove the old ink cartridge.
5. Remove the tape on the bottom of the new ink cartridge.
6. Lower the ink cartridge into the cavity. The ridges on either side of your cartridge will slide into the grooves.
7. Rotate the guard back to the closed position.
8. Close the cover. The system will automatically recognise the new cartridge. The system will return to the Home screen in a few moments
Problem: Error (Ink tank error - 2494)
The printer is reporting the error message Error Code 2494 or the error message Ink tank error - 2494
Resolution
- Remove the cartridge from the printer
- Turn the printer off and unplug it from the socket
- Wait for 10 minutes
- Restart the printer and re-install the cartridge
Problem: Error (No Ink Tank Detected / Ink Not Installed)
Printer is giving the error message (No Ink Tank Detected / Ink Not Installed)
Resolution
1. To clear your message, first open your top cover and select Install Ink Tank.
2. Remove your ink cartridge. You should see 7 gold pins where your ink cartridge was. If any pins appear bent or broken, please stop and place a service request.
3. If your pins look okay, next remove your print head, and wipe off the bottom of your print head with a dry, lint-free cloth.
4. After your print head has been cleaned, insert your print head and ink cartridge
- 4a.Reboot the printer by unplugging it for one full minute and then plugging it back in.
Problem: Fading on print
The cartridge is producing faded printouts
Resolution
1. Open the cover of your machine.
2. The print assembly moves to the front of your machine.
3. Remove your ink cartridge, and set it aside.
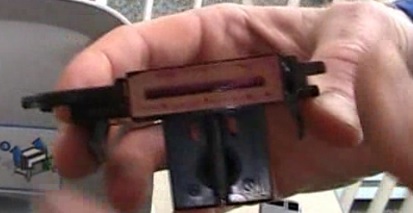
4. Remove your print head by squeezing the clips holding it in place. (See below for an image of what the printhead should look like)
5. Wipe the copper-colored section of your print head with a dry, lint-free cloth.
6. Return your print head to its position in your machine. Push it in until it
7. Reinsert your ink cartridge, and close the cover of your machine. At this time, your ink tank mechanism will re-initialize.
8. Press your Options key, then press the Page Down key twice.
9. Select:
-
- Advanced Features
- Maintenance Mode
- Printer Maintenance
- Purge
- Purge C
10. Once your purge is completed, the display will prompt you to insert an envelope to print a test pattern. Insert an envelope as you normally would to print postage.
11. Your test pattern should appear as a grid with no broken lines or smears in the pattern. If it looks good, press Enter/Yes, and then press Home to return to your Home screen.
12. If your test pattern still looks bad:
-
- Repeat the purge up to three times
If your print quality is still not optimal, your machine may need a replacement print head
Printers that use Pitney Bowes 793-5 cartridges
-
- All trademarks, photos and logos included on this information sheet are the property of their respective owners.
