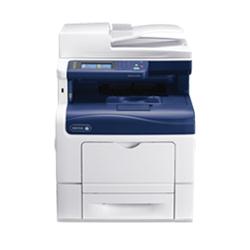
6605VDN
My prints are faded
- If the print quality is poor, remove the toner cartridge from the printer and gently rock the cartridge from side to side.
- This movement helps distribute the toner evenly within the cartridge.
- After rocking the cartridge 5–6 times, re-insert the cartridge into the printer and print a test page.
- If the issue persists, check the life of the maintenance items in your machine in case any of them need to be replaced.
How to Print a Configuration Report
To print out the configuration report, please follow the steps below:
- At the printer control panel, press the Home button.
- Touch Device > About > Information Pages.
- Touch Configuration Report.
- To return to the home screen, press the Home button.
Spots or Lines at regular intervals
If printouts have spots or lines appearing at regular intervals, there may be an issue with another part in the printer.
Resolution
- Measure the distance between the spots or lines.
- 75.3 mm (3 in.) – Imaging Unit
- 28.3 mm (1.1 in.) – Imaging Unit
- 31.1 mm (1.2 in.) – Imaging Unit
- 32.3 mm (1.3 in.) – Imaging Unit
- 25.1 mm (1 in.) – Transfer Belt
- 56.5 mm (2.2 in.) – Transfer Roller
- 82.3 mm (3.2 in.) – Fuser
- If the measurements match any of the distances listed above, the corresponding item may need replacing.
Note: Before replacing any maintenance items
- Power off the printer.
- Wait 30 seconds, then disconnect the power cord.
- Allow 15 minutes for the printer to cool completely before proceeding.
What items are included in the Compatible Xerox 108R01122 Maintenance Kit?
The 40X8421-REM contains the following:
- 1 x Feed roller
- 1 x Transfer belt
- 1 x Bias feed roller
The image below shows which item is which:
How do I replace the transfer belt?
- 1. Open the front door of the printer.
- 2. Remove the waste toner container and set it aside carefully.
- 3. Lift both green levers to unlock the transfer belt unit.
- 4. Using the green handles, pull the transfer belt unit out of the printer and place it on a flat, stable surface.
- 5. Press the green locking tab and lift the old belt out.
- 6. Unpack the new transfer belt and remove all protective tapes or covers.
- 7. Align the new belt with the frame and slide it in. Double-check that it is seated flush and secure.
- 8. Slide the unit back into the printer.
- 9. Lower both the green levers to secure the unit.
- 10. Reinstall the waste toner container and close the front cover.
- 11. Reconnect the power cord, turn the printer on, and follow any on-screen prompts to reset the belt life counter.
How do I replace the feed roller?
Ensure the printer is switched off
- 1.Remove the paper tray and paper
- 2. Slightly pull on the clip on the left holding the roller to release the feed roller.
- 3. Slide the new roller into the slot until it clips into place.
- 4. Reinstall the paper tray into the printer.
How do I replace the bias transfer roller?
- 1. Open the rear printer door
- 2. Pinch the levers at the top and bottom of the bias transfer roller, located on the left and right
- 3. Pull the roller from the machine whilst squeezing the levers.
- 4. Slide the new roller until it clicks into place
Brand names and trademarks are the property of their respective holders and are used for description purposes only.