MX812dxpe
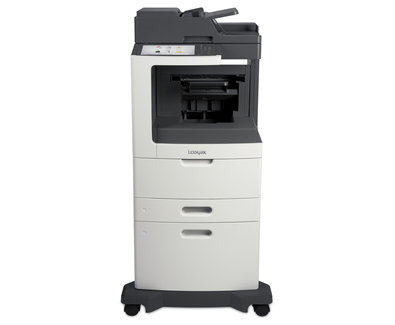
Note: Before replacing any maintenance items
- Power off the printer.
- Wait 30 seconds, then disconnect the power cord.
- Allow 15 minutes for the printer to cool completely before proceeding.
What items are included in the Compatible Lexmark 40X8421 Maintenance Kit (0040X8421)?
The 40X8421-REM contains the following:
- 1 x Fuser unit
- 1 x Transfer roller
- 3 x Seperation rollers
- 3 x Pickup/ Media rollers
The image below shows which item is which:
How do I replace the fuser unit?
- 1. Open the rear door of the printer and slide it off the hinges to remove it.
- 2. Press the two side latches to gain access to the fuser unit
- 3. Unscrew the two fuser thumb screws
- 4. Pull out the old fuser, install the new fuser and tighten two fuser thumb screws
- 5. Close the fuser access door, reattach and close the rear door.
How do I replace the transfer roller?
Do not touch the black surface of the new roller. Oils from your skin will degrade print quality.
- 1. Open the printer’s front door and the control panel cover.
- 2. Remove the waste toner bottle and the imaging unit.
- 3. Use the gear on the right of the transfer roller to gently pull the right side up, then slide the whole roller to the right to release it.
- 4. Unpack the new transfer roller, but keep the protective sleeve on the foam for now.
- 5. Insert the left side into the arm first, then the right. You’ll hear a click when it’s locked.
- 6. Gently pull the protective sleeve off the roller.
- 7. Put the imaging unit and toner back in, then close all covers.
How do I replace the pickup/ media assembly?
Avoid touching the rubber roller surface to prevent future paper jams.
- 1. Pull the paper tray out until it stops, lift it slightly, and remove it completely.
- 2. Flip down the front duplex flap to see the roller assembly.
- 3. Squeeze the latches on both sides and slide the assembly to the right to pull it out.
- 4. Hold the small paper flag down and out of the way while inserting the new unit. If it gets trapped or snapped, the printer won’t function correctly.
- 5. Slide the new assembly in until it locks and reinstall the paper tray.
How do I replace the seperator roller assembly?
- 1. Pull the paper tray entirely out of the machine.
- 2. Press the release button on the tray to pop the old roller assembly out.
- 3. Insert the right side of the new assembly first, then insert the left side down until you hear a click.
- 4. Slide the tray back into the printer.
Brand names and trademarks are the property of their respective holders and are used for description purposes only.